Hello! Welcome back to another edition of Artisan Wednesday Wow!
It's getting close to the time of year when my mind seems consumed with how grateful I am to have such an amazing family, as well as great friends and neighbors. There have been a few people in particular that I have wanted to do something a little special for this fall, just to let them know how much I appreciate and love them. What better way to give them that special gift than in a hand decorated gift box?!
With plenty of options for making your gift box unique, and PLENTY of people that deserve something special, be sure to add decorative label gift boxes to your next stamping order! By the way, ever wondered why there is a "regular price" and "preferred price" when you are shopping Stampin' Up! online? Be sure that you have selected your demonstrator so that you get the "preferred price"! (Your demos name and info should be in the top right corner, and it should say "you are shopping with {demos name}).
Let's continue the hop and see what the other Artisans have to share with us today by heading to Cathy's blog next! I tell ya, I just can't get enough of her, I LOVE her style!
supplies used: Dictionary, Lots of Thanks, and Magnificent Maple stamp sets; Pumpkin Pie, Pear Pizzazz, Crushed Curry, Cajun Craze, Whisper White, and VersaMark ink pads; Basic Black, Very Vanilla, and Pear Pizzazz cardstock; Decorative Window Gift Box; 1-1/4" Burlap Ribbon, Victoria 5/8" Crochet Trim, and Natural Linen Thread; Naturals Designer Buttons; Heat & Stick and White embossing powder; Orange Stampin' Glitter; Labels Collection Framelits; Stamping Sponges; Heat Tool; Big-Shot die-cutting machine; dimensionals, snail glue, and mini glue dots.
Showing posts with label Fall Projects. Show all posts
9.17.2013
9.10.2013
Artisan Wednesday WOW!
It's time again, time for another Artisan Wednesday WOW blog hop!
I admit, the "box" of stuff Stampin' Up! sent me for this month to create with has been a challenge. . . I don't do Halloween. . . at all. . . and the "box" was 90% (possibly more) Halloween stuff!!! But, I do like to decorate for the seasons, so. . . I thought I could try and make something fallish that could easily be changed a bit for those of you who do Halloween. . . and, because of the lengthy tutorial I will be sharing today, I will spare you all my crazy ramblings and get right down to business. . .
How did I do this you ask? It is quite simple. . . but time consuming. . . and it takes patience for the paint to dry!
1. Take some white acrylic craft paint and add a few drops of ink refill. I used Crumb Cake and Soft Suede. Then, paid an old mason jar and be sure to let it dry completely! Like, overnight! Then, once it is dry, take a Stampin' Sponge and and a Classic Ink Pad and sponge on some ink!
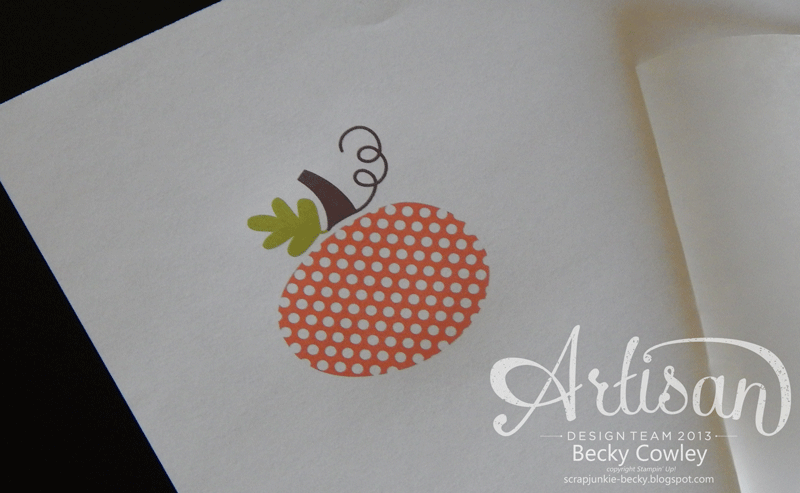
2. Then, I used the Halloween Happiness Digital Download in My Digital Studio, cropped out the polka dot pumpkin, re-colored it, and printed it out on a plain piece of paper.
3. I then covered it up with a small piece of wax paper, and used masking tape to hold it in place.
4. I ran the paper with the wax paper taped on it through the printer again so that it printed this time on the wax paper. (note: you must use an inkjet printer, I don't think this will work with a laser printer.)
5. I then pulled up the wax paper with my pumpkin printed on it, and laid it onto my painted jar.
6. Using my Bone Folder, I rubbed the image until the ink was transferred onto my jar.
7. Pull up the wax paper, and the image will be "tattooed" on your jar! How cool is that?! I then sealed the entire jar with a matte finish clear spray paint.
Now, let's go see what the other Artisans are up to this week, shall we?
Supplies: Halloween Happiness Digital Download; My Digital Studio; Crumb Cake and Soft Suede Ink Refills; Chocolate Chip Classic Ink Pad; Cajun Craze, Pumpkin Pie, Crushed Curry, and Old Olive cardstock; 1-1/4" Burlap Ribbon; Autumn Accents Bigz die; Big Shot die cutting machine. Other: Kerr jar; white craft paint; clear spray paint; antique bronze floral wire.
I admit, the "box" of stuff Stampin' Up! sent me for this month to create with has been a challenge. . . I don't do Halloween. . . at all. . . and the "box" was 90% (possibly more) Halloween stuff!!! But, I do like to decorate for the seasons, so. . . I thought I could try and make something fallish that could easily be changed a bit for those of you who do Halloween. . . and, because of the lengthy tutorial I will be sharing today, I will spare you all my crazy ramblings and get right down to business. . .
How did I do this you ask? It is quite simple. . . but time consuming. . . and it takes patience for the paint to dry!
1. Take some white acrylic craft paint and add a few drops of ink refill. I used Crumb Cake and Soft Suede. Then, paid an old mason jar and be sure to let it dry completely! Like, overnight! Then, once it is dry, take a Stampin' Sponge and and a Classic Ink Pad and sponge on some ink!
2. Then, I used the Halloween Happiness Digital Download in My Digital Studio, cropped out the polka dot pumpkin, re-colored it, and printed it out on a plain piece of paper.
3. I then covered it up with a small piece of wax paper, and used masking tape to hold it in place.
4. I ran the paper with the wax paper taped on it through the printer again so that it printed this time on the wax paper. (note: you must use an inkjet printer, I don't think this will work with a laser printer.)
5. I then pulled up the wax paper with my pumpkin printed on it, and laid it onto my painted jar.
6. Using my Bone Folder, I rubbed the image until the ink was transferred onto my jar.
7. Pull up the wax paper, and the image will be "tattooed" on your jar! How cool is that?! I then sealed the entire jar with a matte finish clear spray paint.
Now, let's go see what the other Artisans are up to this week, shall we?
Supplies: Halloween Happiness Digital Download; My Digital Studio; Crumb Cake and Soft Suede Ink Refills; Chocolate Chip Classic Ink Pad; Cajun Craze, Pumpkin Pie, Crushed Curry, and Old Olive cardstock; 1-1/4" Burlap Ribbon; Autumn Accents Bigz die; Big Shot die cutting machine. Other: Kerr jar; white craft paint; clear spray paint; antique bronze floral wire.
Subscribe to:
Posts (Atom)