Showing posts with label 3-D items. Show all posts

5.13.2015

Stampin' Up! Artisan Blog Hop-You're So Sweet

Hello! Welcome back to another Stampin' Up! Artisan Design Team Blog hop! Join us each week as the global Stampin' Up! Artisan Design Team shares our ideas using Stampin' Up! products with you!

This month the ADT is creating with some new sets that will be coming out in the new catalog! WAHOOOO! I am so excited about the new catalog that will be launching soon, and I am even more excited to be sharing these "sneak peeks" of some new products with you!

Tomorrow is Gage's 6 year adoption anniversary, and as always we have something amazing planned for this special little guy on this special HUGE occasion! Creating with Gage in mind, I chose to feature the You're So Sweet set that coordinates perfectly with the Treat Bags Thinlilts Dies! (Plus, starting June 2nd, you can bundle the set and dies together to save 15%!) Check out this fun little ensemble:


I love that with the Treat Bag Thinlits you can use DSP to create custom treat bags that will coordinate with anything! Here I used the Envelope Paper in the new 2015-2017 In Color Tip Top Taupe (coming soon!) to create my gift bag.


The cute little mini clothespin is covered with the Cherry On Top Designer Washi Tape (also coming soon!) Another fun product to come? Cotton Paper Assortment in bright, fabulous colors! It is lightweight so you can use it to create teat bags and fun accents like these fun little tassels cut with the fringe scissors!

Now I just need to wrap presents and make decorations!

But, before I do, I'm going to continue on the hop and see what other fabulous creations the ADT has to share! Next stop? CINDY!
http://nutmegcreations.blogspot.ca/2015/05/artisan-may-2.html

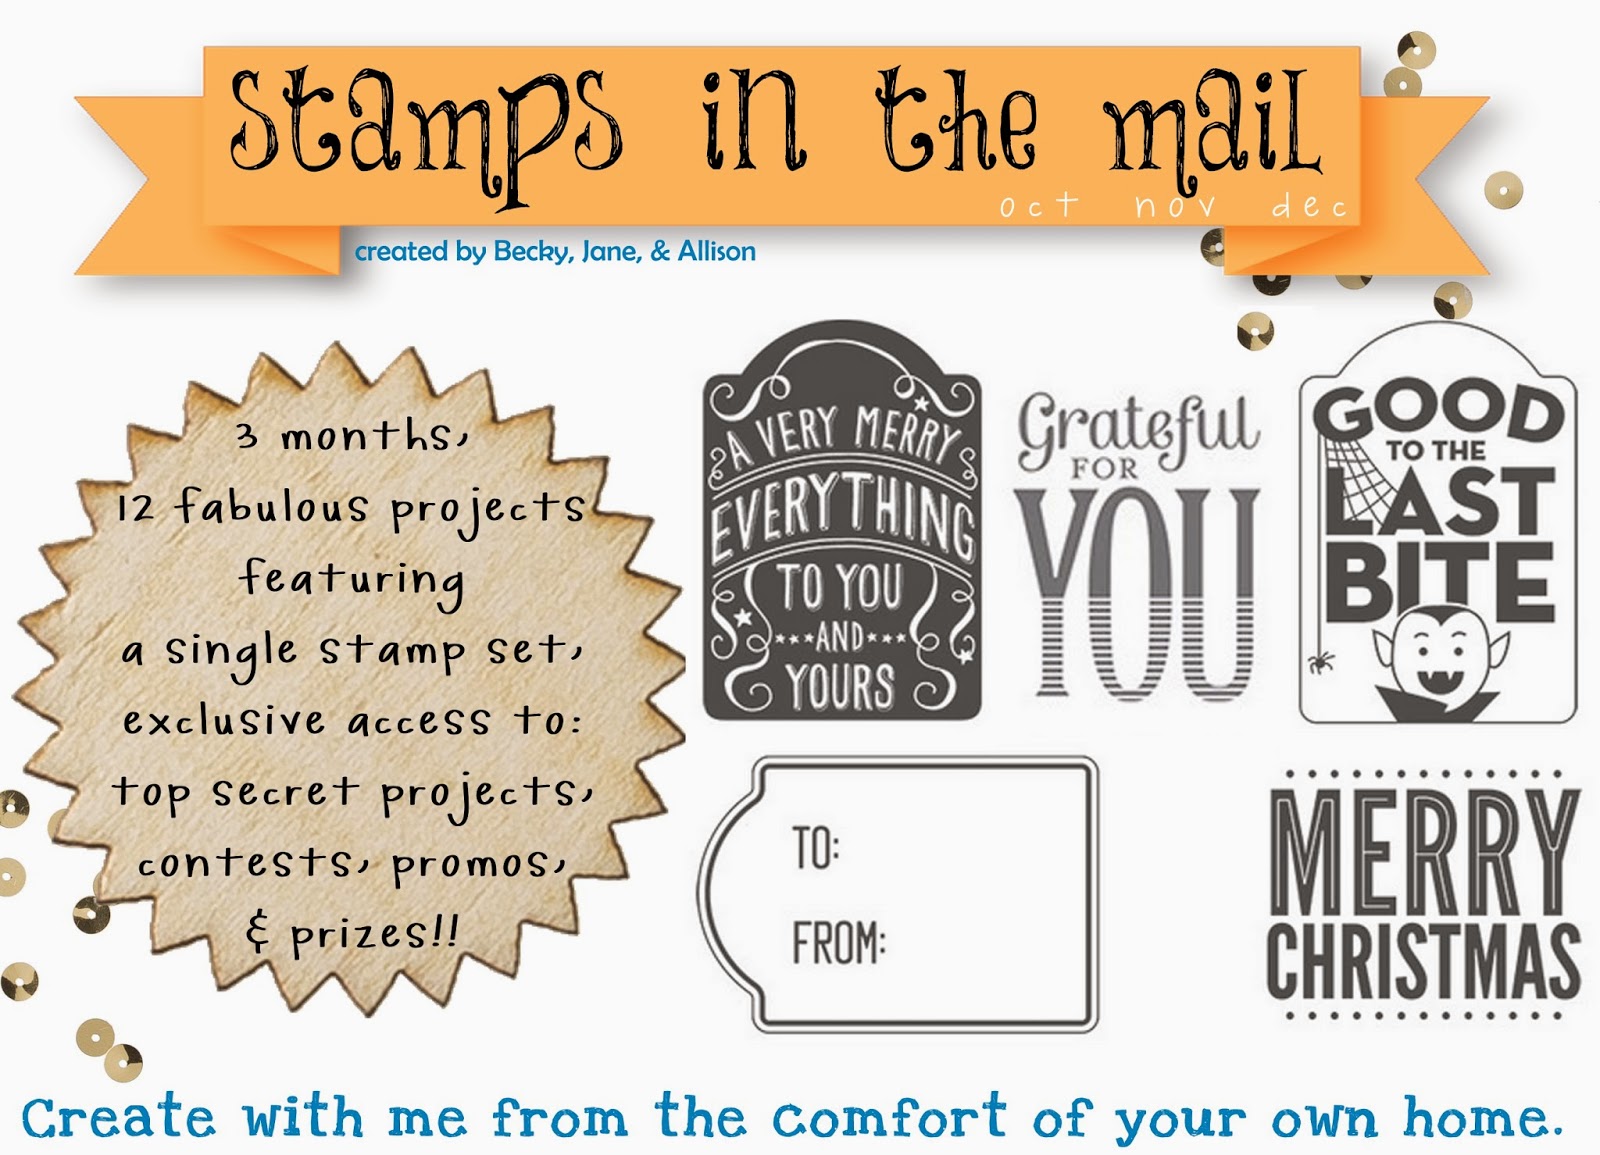
A new round of Stamps in the Mail is open! Allison and I are now working with the very talented Susan Wong from New Zealand! We are busy preparing a round chuck full of ideas and projects using the Hello Darling stamp set! From beautiful to masculine, and everything in between, this is a round you definitely won't want to miss out on! Sign up today! Check out a few of the sneaks for May's projects. . .
http://scrapjunkie-becky.blogspot.com/p/stamps-in-mail.html

2.16.2015

A Creative Journey

Hello Everyone! Today I am over at the Stampin' Up! Corporate Blog sharing a creative mistake journey, and some fun cards I created with a stamp that I carved with the Undefined Stamp Carving Kit. . . be sure and go check it out!

Here are a few more details on the "nerdy-bird" bookmark card. . .

Gage loves to read. Well, actually, he loves for me to read to him! Regardless of who is reading. . .  this is something we enjoy doing together. The great part of our "reading time" is that I can use my reading to him as leverage for him to first get his reading homework done. The deal is, he gets his reading homework done, then I will read him a chapter out of his favorite chapter book. Is that bad? I don't know. . .  but for now, it works! The problem is that we are always loosing what chapter we are on as the flimsy bookmarks we create with a torn sheet of paper always seem to wiggle their way loose and fly out of the book. . . the solution? A bookmark with magnets to keep it in place! 
It keeps our place perfectly regardless of the crazy journey the book may take!

 
This bookmark can also double as a gift by sliding it onto a cardstock panel of a card raised up with dimensionals.
Bonus, with the Alphabet Rotary stamp you can customize your bookmark with your favorite quote, short poem, phrase, or pun!
 Hope you enjoyed! Remember to visit my post over at Stampin' Up! to see more fun ideas and cards with this stamp!

1.14.2015

Stampin' Up! Artisan Blog Hop-&

Welcome back for another Stampin' Up! Artisan Design Team Blog Hop! This year is an international team, so be sure to travel around the world with us as as we share our creativity and ideas with you!

I {heart} mugs.

I must have my morning coffee to survive the day.

I made a fun {ampersand} coffee mug using the Birthday Bash Designer Washi Sheets, the You Plus Me stamp set, and some porcelain chalk paint. Check it out:


Fun, eh?! And. . . super easy to make! Here's how:

Stamp your stamp on a washi sheet.
 
Use an exact-o knife to cut the image out.
Save the cut out, you could use it to make a mug with a mirror image. Place the negative (or positive, depending on what you want your mug to look like) on your mug.
Paint over the mask with porcelain chalkboard paint. Allow ample time to dry.

Remove the mask, and you have your custom mug!

Let's go see the details on Cindy's project, shall we?!
http://nutmegcreations.blogspot.ca/2015/01/artisan-jan-3.html

Register for this month's Stamps in the Mail! E-mail me today to sign up! If you are in Canada, you can still get the same kit, just contact Allison Okamitsu!


12.17.2014

Stampin' Up! Artisan Design Team Blog Hop

Welcome back to another Stampin' Up! 2014 Artisan Design Team Blog Hop! Be sure to travel through the entire hop, as you won't want to miss a thing this amazing international team has to share!

I am not a fan of the cold. At all. I despise cold weather. . . but. . . I do love bundling up in my plush warm blankie, warm drink in hand, while gazing out the window at the gorgeous wonder of freshly fallen snow. The December Wonder stamp set and the Snowflake Card Thinlits Dies are perfect for creating decor to make your own warm indoor winter wonderland!

 
The team will be taking next week off to celebrate the holiday with family and friends, but we invite you to join us the following week as we kick of a new year January 1st! Now, let's head on over to Cindy's to see the details on her fabulous project!
http://nutmegcreations.blogspot.ca/2014/11/artisan-dec-3.html
Supplies used: December Wonder stamp set; Smoky Slate ink pad; Very Vanilla and Whisper White cardstock; Silver Glimmer paper; All Is Calm DSP; Tea Lace Paper Doily; Silver Metallic Baker's Twine; Frosted Sequins; Snowflake Card Thinlits and Deco Labels Framelits Dies; Simply Scored Tool; other: dowel and spool.

 Project Life Kits are still available!
http://scrapjunkie-becky.blogspot.com/2014/11/project-life.html
 

11.20.2014

Fancy Friday-Pretty Packages

Welcome to another Fancy Friday! Be sure to continue on the hop to see what everyone has to share, I am SURE you are gonna LOVE everything!

Before I share this week's challenge and my project, I have an announcement to make! I forgot to post the winner from last month's Fancy Friday giveaway. . . apologies. . . so, before I forget yet again, the winner of the Trim the Tree DSP stack is. . . . .

Rosemarie Calpin!

Rosemarie, please e-mail me your address, and I will get that mailed to you ASAP!

Now, onto this month's Fancy Friday Challenge. . .  for this moth we chose the theme "Pretty Packages". If there is one thing I love more than shopping for the perfect gift, it is wrapping it up! To me, taking a little extra time to package up that perfect gift and make it look pretty shows just how much you really care about the person you are giving it to.

Although I have branched out the past couple of years into more bolder colors, my favorite is still the soft, subtle, tone-on-tone look, especially when used with neutrals! Here I used the Gift Box Punch Board to create a Very Vanilla box, and then decorated it with neutral embellishments. Now I just need to find the perfect gift to put in it. . .

Curious to see what Cathy has made? Me too! It's ultra FANCY I'm sure of it! Let's head on In the Cat Cave and check it out!

http://www.inthecatcave.com/2014/10/nov-ff.html
Be Sure to sign up for this month's round of Stamps in the Mail!
http://scrapjunkie-becky.blogspot.com/p/stamps-in-mail.html
Supplies used: Good Greetings stamp set; Crumb Cake Ink Pad; Very Vanilla and Naturals Ivory Cardstock; Newsprint DSP; 1-1/4" Burlap Ribbon; Venetian Crochet Trim; Linen Thread; Gift Box Punch Board; Simply Scored Tool; Stars Framelits; Snowflake Card Thinlits Die.

11.05.2014

Stampin' Up! Artisan Blog Hop-Holiday Invitation

Welcome back to another Stampin' Up! 2014 Artisan Design Team Blog Hop! Be sure to travel on and see what Artisans from all over the world have to share with you this week!

'Tis the season. . . for PARTIES! Yup! That's right! And there's no better way to get your party started off right than with the perfect invitation using the Holiday Invitation stamp set! I'm sure you've seen the fabulous invites created with this set in the Holiday Catalog, but why stop at the invites? Stretch your set by using it for party favors, game boards, treat holders, and party decorations! Check out these fun little gift and treat holders:

And the cute little pumpkin? Yeah. . . made with the Gift Bow Bigz Die! Yup! Angels, snowmen, turkeys, and pumpkins to name a few, the Gift Bow die is for more than just making gorgeous bows for all of your packages!

Be sure to check out the product lists for these projects at the bottom of the post, I think you will be surprised at the how versatile some of your "ordinary" products really can be! Questions? Leave a comment or e-mail me!

Be sure to continue on the hop by clicking the next button. . . next up? CINDY!
http://nutmegcreations.blogspot.ca/2014/11/artisan-nov-1.html

Be Sure to sign up for this month's round of Stamps in the Mail!
http://scrapjunkie-becky.blogspot.com/p/stamps-in-mail.html

Supplies used for Give Thanks Pumpkin: Holiday Invitation stamp set; Soft Suede ink pad; Tangelo Twist, Old Olive, Mossy Meadow, and Naturals Ivory cardstock; Gift Bow Bigz L and Fun Fall Framelits Dies; Old Olive Baker's Twine; twig.

Supplies used for Be Merry Tag Topper Box: Holiday Invitation stamp set; Whisper White and Crumb Cake ink pads; Kraft, Cherry Cobbler, Old Olive, Mossy Meadow, Basic Black, and Naturals Ivory cardstock; Skin Tones Blendabilites; Project Life Journaling Pen; Hearts Collection Framelits Dies; Bird Builder, 1/4" Circle, 1/8" Circle, and Scalloped Tag Topper punches; Simply Scored Scoring Tool; Gold Metallic Bakers Twine.

Supplies used for Celebrate Box: Holiday Invitation Stamp Set; Lost Lagoon in pad; Whisper White cardstock; Silver Glimmer and Dazzling Diamonds Glimmer Paper; Under the Tree DSP; Gift Box Punch Board; Snowflake Card Thinlits Dies; 1-1/4" Burlap Ribbon.

10.22.2014

Stampin' Up! Artisan Blog Hop-Grateful For You

Welcome Back to another Stampin' Up! 2014 Artisan Design Team Blog Hop! Be sure to join us as we travel around the world to see what inspiration and fun projects this international team has in store to share with you!

It's no secret that fall is my absolute favorite time of year! Especially since this is the season that we are reminded to give thanks for all we are blessed with and grateful for. . . though this is something I think should be done all year round. . . but with our busy lives, perhaps it is good that we have a special occasion set aside for us to make time to give thanks.

I am not a big decorator, SURPRISE! Though we have lived in our current home for 8 years now, it is still seemingly "empty" as far as decorations go. . . I am not big on lots of things to dust. But last year I did manage to make a very cute harvest banner with the Build a Banner Simply Created kit. Since I already have a cute banner to display, I decided to use the kit for something else. My friend Melody Hyde had a cute idea to sew two of the banners together to make a cute pocket, and I thought it was a very clever idea. . . so I went with it!

I used linen thread to sew the pieces together, then I decorated it with my For All Things stamp set. . . I just LOVE this set! I added some Autumn Wooden Elements and Blackberry Bliss Ribbon, then stuffed it full of yummies! This will make a perfect little something to hang on junior's door and surprise him on Thanksgiving morning. . .
. . . that is, if I can resist eating the yummies before then!

Let's go see what Cindy has been creating, shall we?!
http://nutmegcreations.blogspot.ca/2014/10/artisan-oct-4.html

Supplies used: For All Things stamp set; Blackberry Bliss, Cajun Craze, Hello Honey, and Stazon On Jet Black Ink Pads; Build A Banner Simply Created Kit; Naturals Ivory cardstock; Linen Thread; 1-1/4" Burlap and Blackberry Bliss Stitched Satin Ribbon; Autumn Wooded Elements.

Check out this month's sneak peeks for Stamps in the Mail using the Merry Everything stamp set! Registration closes October 31st, so sign up today! Click on the ad below for more info. . .

http://scrapjunkie-becky.blogspot.com/p/stamps-in-mail.html
http://scrapjunkie-becky.blogspot.com/p/stamps-in-mail.html 

9.24.2014

Stampin' Up! Artisan Blog Hop-Feather Necklace

Welcome back to another Stampin' Up! Artisan Blog Hop! I hope you join us as we travel around the world to see what this international team has to share, you will be amazed and inspired for sure!

Every woman I know is a collector of sorts. For some it's shoes, for others it's purses, for me. . . it's jewelry. I LOVE jewelry, and I have quite a collection (almost as large as my stamp collection)! I have fond memories as a child dressing up in my great-grandmother's jewelry with my cousins and sister. . . Grandma Fernie had a dresser FULL of jewelry!

When I spotted this awesome necklace on The Crafted Sparrow, I immediately fell in love and knew I had to make something similar for myself! The Four Feathers set and the Simply Pressed Clay worked perfectly for creating my own trendy feather necklace! Check it out:


 It was actually fairly easy to create! It took me less than 10 minutes (not including drying time for the clay). Look at the pics below for the process:

You can change the color of the Simply Pressed Clay by adding a few drops of your favorite ink refill, I used Tangerine Tango. I then used the handle of my Sweet Pressed Cookie Stamp to flatten and even out the clay. Once it was smoothed out, I pressed my feather stamp into it, let it dry, and then trimmed it with my Paper Snips. I poked a hole in the tops of the clay feathers with my Paper-Piercing Tool, and then used some jump rings to hook everything onto my necklace chain. Pretty cool, huh?!

Let's go visit Cindy!

http://nutmegcreations.blogspot.ca/2014/09/artisan-sept-4.html

 photo SITMAd-001_zps9c09c1e7.jpg

Don't miss out on Stamps in the Mail! We are heading in to round 3, but you can still sign up and receive round 1 and 2! Click on the add for more info. Plus, refer a friend and if they register for Stamps in the Mail for Round 1 Month 3 you will get $5 off your registration fee! (Be sure and email me with the friend you refer so I can keep my eye out for their registration!)

9.17.2014

Stampin' Up! Artisan Blog Hop

Welcome back to another Stampin' Up! 2014 Artisan Design Team Blog Hop! Be sure to continue the hop around the world and see what the whole team has to share!

When Nate and I were first married, I worked as a Special Ed Para and spent the day working with kids who were struggling to keep up in their mainstream classroom. The extra help in a smaller group setting worked wonders for them to advance in their math, reading, and other academics. I found that most of the kids I taught were VERY intelligent, they just didn't fit the "typical mold" and needed to learn in a different way than most. Many times I had to get very creative in my teaching methods in order to keep the kids engaged. I found that if the kids were having fun, they were more likely to learn. I made MANY folder games to encourage the kids to learn and have fun.

When Gage was diagnosed with SPD and Autism Spectrum Disorder, I thought my teaching experience would mean I would have no problems making sure Gage was keeping up in school. Hahahahaha, the jokes on me! There was only one factor I didn't consider. . . he was my own child, and we all know that our kids are MUCH better for other adults than they are for their parents, am I right?! Gage LOVES to push my buttons and test his grounds with me, and when it comes to doing his homework, um. . .  yeah. . .  he flat out refuses to do it. Of course, I can't make him do it, so I have found that I need to get creative in how we go about homework. So, back to my early years, I have resorted to try and come up with ways to make homework fun. Wha?! Homework fun?! I created this super cute and fun folder game using the Motlley Monsters DPS for Gage, and now he loves to practice his math facts!

I made the gameboard and instructions non-specific so that I can simply change out the flash cards and use it for subtraction, multiplication, or division.
Ah! How nice it is to not have to argue with my 6-year-old as to why he needs to practice math facts. . .

Let's go see what Cindy has to share with us, shall we?

http://nutmegcreations.blogspot.com/2014/09/artisan-sept-3.html

Supplies used: Epic Alphabet set; Motlley Monsters DPS; Tangelo Twist, Crushed Curry, Bermuda Bay, Whisper White, and Basic Black cardstock; Tangelo Twist, Crushed Curry, and Bermuda Bay Stampin' Write Markers; White Chalk Marker; other: file folder and dice.


 photo SITMAd-001_zps9c09c1e7.jpg
Don't miss out on Stamps in the Mail! We are heading in to round 3, but you can still sign up and receive round 1 and 2! Click on the add for more info. Plus, refer a friend and if they register for Stamps in the Mail for Round 1 Month 3 you will get $5 off your registration fee! (Be sure and email me with the friend you refer so I can keep my eye out for their registration!)

9.10.2014

Stampin' Up! Artisan Blog Hop

Welcome back to another Stampin' Up! Artisan Blog Hop! Join us as we travel around the globe to see the 2014 international ADT Team's AMAZING work!

Last week I showed you a glimpse of what I have been up to for what seems like forever! Today I am going to show you the end result!
We recently celebrated my in-laws 50th Wedding Anniversary. . . and of course I volunteered to be in charge of decorating! It is a madness passion. . . truly it is. . . I enjoy doing it!
 I cut and rolled over 1000 flowers made with the Spiral Flower Die. . . used 123 hot glue sticks. . . 5 spools of 1-1/4" Burlap Ribbon. . . 2 spools each of Venetian Crochet Trim, 7/8" Cotton Ribbon, 5/8" Gold Satin Ribbon, and Linen Thread. . . a spool of Gold Sequin Trim. . . and burned my fingers with the hot glue gun countless times!
 Nate's Nephew's wife Kerstie made the most delicious cake and cupcakes. . . 
And what party would be complete without a fun photo booth to capture the memories?!
 Here's Nate's parents, the happily married couple of 50 years. . .
. . . and of course my silly little stinker!
We had a TON of fun! But, phew! I sure am glad it's over!

Let's head on over and see what Cindy has been up to!
http://nutmegcreations.blogspot.com/2014/09/artisan-sept-2.html

 photo SITMAd-001_zps9c09c1e7.jpg
Don't miss out on my Stamps in the Mail! We are heading in to round 3, but you can still sign up and receive round 1 and 2! Click on the add for more info. Plus, refer a friend and if they register for Stamps in the Mail for Round 1 Month 3 you will get $5 off your registration fee! (Be sure and email me with the friend you refer so I can keep my eye out for their registration!)