It's time again, time for another Artisan Wednesday WOW blog hop!
I admit, the "box" of stuff Stampin' Up! sent me for this month to
create with has been a challenge. . . I don't do Halloween. . . at all. .
. and the "box" was 90% (possibly more) Halloween stuff!!! But, I do
like to decorate for the seasons, so. . .
I thought I could try and make something fallish that could easily be
changed a bit for those of you who do Halloween. . . and, because of the lengthy tutorial I will be sharing today, I will spare you all my crazy ramblings and get right down to business. . .
How did I do this you ask? It is quite simple. . . but time consuming. . . and it takes patience for the paint to dry!
1. Take some white acrylic craft paint and add a few drops of ink refill. I used
Crumb Cake and
Soft Suede. Then, paid an old mason jar and be sure to
let it dry completely! Like, overnight! Then, once it is dry, take a
Stampin' Sponge and and a Classic Ink Pad and sponge on some ink!
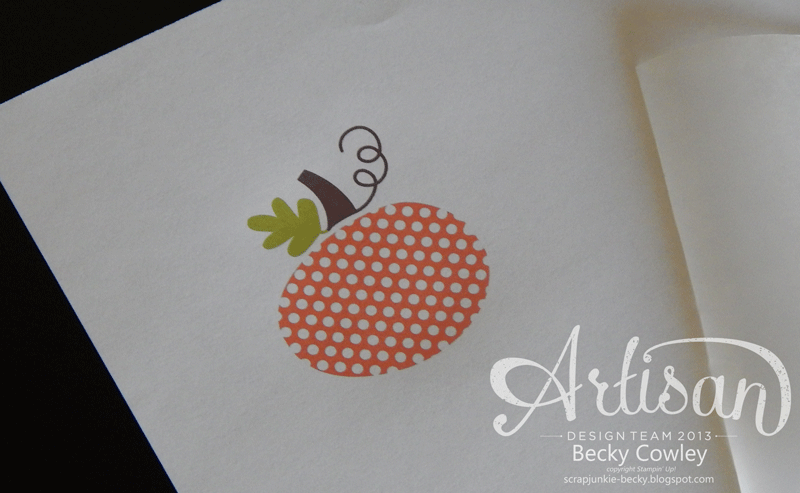
2. Then, I used the
Halloween Happiness Digital Download in
My Digital Studio, cropped out the polka dot pumpkin, re-colored it, and printed it out on a plain piece of paper.
3. I then covered it up with a small piece of wax paper, and used masking tape to hold it in place.
4. I ran the paper with the wax paper taped on it through the printer again so that it printed this time on the wax paper. (note: you must use an inkjet printer, I don't think this will work with a laser printer.)
5. I then pulled up the wax paper with my pumpkin printed on it, and laid it onto my painted jar.
6. Using my
Bone Folder, I rubbed the image until the ink was transferred onto my jar.
7. Pull up the wax paper, and the image will be "tattooed" on your jar! How cool is that?! I then sealed the entire jar with a matte finish clear spray paint.
Now, let's go see what the other Artisans are up to this week, shall we?
Supplies: Halloween Happiness Digital Download; My Digital Studio; Crumb Cake and Soft Suede Ink Refills; Chocolate Chip Classic Ink Pad; Cajun Craze, Pumpkin Pie, Crushed Curry, and Old Olive cardstock; 1-1/4" Burlap Ribbon; Autumn Accents Bigz die; Big Shot die cutting machine. Other: Kerr jar; white craft paint; clear spray paint; antique bronze floral wire.


WOW...this is incredible. Love it!
ReplyDeleteThis is fabulous, Becky! I absolutely love everything about this :) I don't do Halloween either, so it is really refreshing to see a beautiful fall project.
ReplyDeleteSpeechless. This is incredible!!
ReplyDeleteOoooo! This is SO much fun, Becky!! What a clever idea (have NEVER seen this one before!!) LOVE it!! :)
ReplyDeleteSo cool! Thanks for sharing the step by step photos!
ReplyDeleteWhat a wonderful centerpiece for the table! - Rexene
ReplyDeleteThis is beautiful Becky! I think I might have to try it! Great job!
ReplyDeleteClever and cute@
ReplyDeleteWhat a fabulous idea - I will be doing this at the weekend for sure!
ReplyDeleteThis came out super fabulous! Thanks for the tutorial too! Never would have thought of doing that!
ReplyDelete